Thursday, March 31, 2011

With Sympathy

Making these cards are not always fun...but we do need these cards sometimes too.


Supplies Used:
Stamp Set: Thanks for Caring 121901W & 121961C
Card Stock: Soft Suede -5 1/2 x 8 1/2 scored at 4 1/4; Baja Breeze -4 x 2 & circle; Crumb Cake -2 x 3; Basic Gray -1 3/4 x 3; Very Vanilla -circle & oval
Ink: Stazon Jet Black Ink Pad 101406; Classic Stampin' Pad -Crumb Cake 121030; Baja Breeze 111833
Other Supplies: 3/16" Corner Small Punch 119871; 2" x 1 3/8" Oval Extra-Large 119859; Mat Pack 105826; Paper-Piercing Tool 116631; Circle Scissor Plus 112530; Glass Mat 112531; Dimensionals 104430; Sponges 101610; Mini Library Clips 109857; Neutrals Brads 119736

Today is the last day to receive free products from the Sala-a-bration! If you place an order for $60 or more you can receive free stuff. Who doesn't love free stuff!!! CLICK HERE TO VIEW THE SALE-A-BRATION CATALOGUE! Click on Shop Now in the right column to place your order or send me an email at scrapwithsusie.@hotmail.com

Have a great day!!

Susie

Wednesday, March 30, 2011

You're Invited


This is a simple invitation that I made. What I love about this is that you can turn it into any kind of invitation such as a birthday invite, baby invite and so on. With a change of colour, this invite is easy to make several of.

Supplies Used:
Stamp Set: Inviting 119153W & 120630C
Card Stock: Real Red -5 1/2 x 4 1/4; Whisper White -5 1/4 x 4
Ink: Classic Stampin' Pad -Real Red 103133; Stazon Jet Black Ink Pad 101406
Other Supplies: Jumbo Eyelet Antique 108431; 1/8" Taffeta Ribbon Real Red 119251; Crop-a-dile 108362; Stamp-a-ma-jig 101049

TOOL TIP:
Are you wondering what a Stamp-a-ma-jig is?


The Stamp-a-ma-jig is a stamp positioner that allows you to have precise stamp alignment every time you stamp. So when you are stamping your sentiments and want to make sure it's straight, get out your Stamp-a-ma-jig!!

Have a great day Stampin' Readers!!

Susie

Monday, March 28, 2011

Explosion Box

I love making 3-D items and especially love making them for others. I was asked to make this box for a friend who has a friend that had a baby girl. So grab a coffee and have a seat to stay a while. It's a long post today!!


This is the outside of the box, nice and simply! On the front of the box base I have Love DSP (retired) on all 4 panels. On the box side flaps I tied Victoria Crochet Trim and Pretty in Pink 3/8" Taffeta Ribbon together.


For the top of the lid, I used the Welcome Baby from the Punch Bunch Sale-a-bration set. I stamped the stamp first in So Saffron ink and then smacked it on Rose Red ink to give it a fun look. I punched it out using the Large Tag punch in Whisper White card stock. I punched out Close to Cocoa (retired) card stock with the Extra-Large Tag punch. Popped them up on dimensionals. I added some more Victoria Crochet Trim and 3/8" Taffeta Ribbon in Pretty in Pink with a Chocolate Chip 5/8" Brad. I placed all this on Pretty in Pink card stock and then on Perfect Plum card stock. I also used my Cutter Kit on both layered card stock to give it that distressed look.


Here is the view of the inside of the explosion box. I stamped Congrats from the Level 1 Hostess set Silhouette Sentiments on the Whisper White card stock and allowed room for some writing.


The inside of the explosion box has 3 layers of flaps. Bottom layer is Close to Cocoa (retired), middle layer is Perfect Plum and top layer is Pretty in Pink. I used my 3/16" Corner Small Rounder on the corners of all flaps. All edging is distressed using the Cutter Kit.

I used the little bear from the stamp set Bear Hugs, stamped it in Chocolate Chip on the Pretty in Pink flap then re-stamped this image on DSP and cut out the booties, diaper and bib and glued them on the bear using the Anywhere Glue Stick. Then I stamped the flowers from the Bear Hugs stamp set randomly on the Pretty in Pink card stock using Rose Red classic ink.

This flap I used the larger photo corner of the Photo Corners Extra-Large punch for each corner with the Love DSP (retired). I added a bow using the Victoria Crochet Trim and 3 tags from the Jewelry Tags Medium punch and attached to the ribbon with a silver brad.

I drew lines for stems then added this cute buttons from the Sale-a-bration catalogue using Glue Dots. I then added a strip of Perfect Plun card stock crimped by using the Crimper. And added a paper clip.

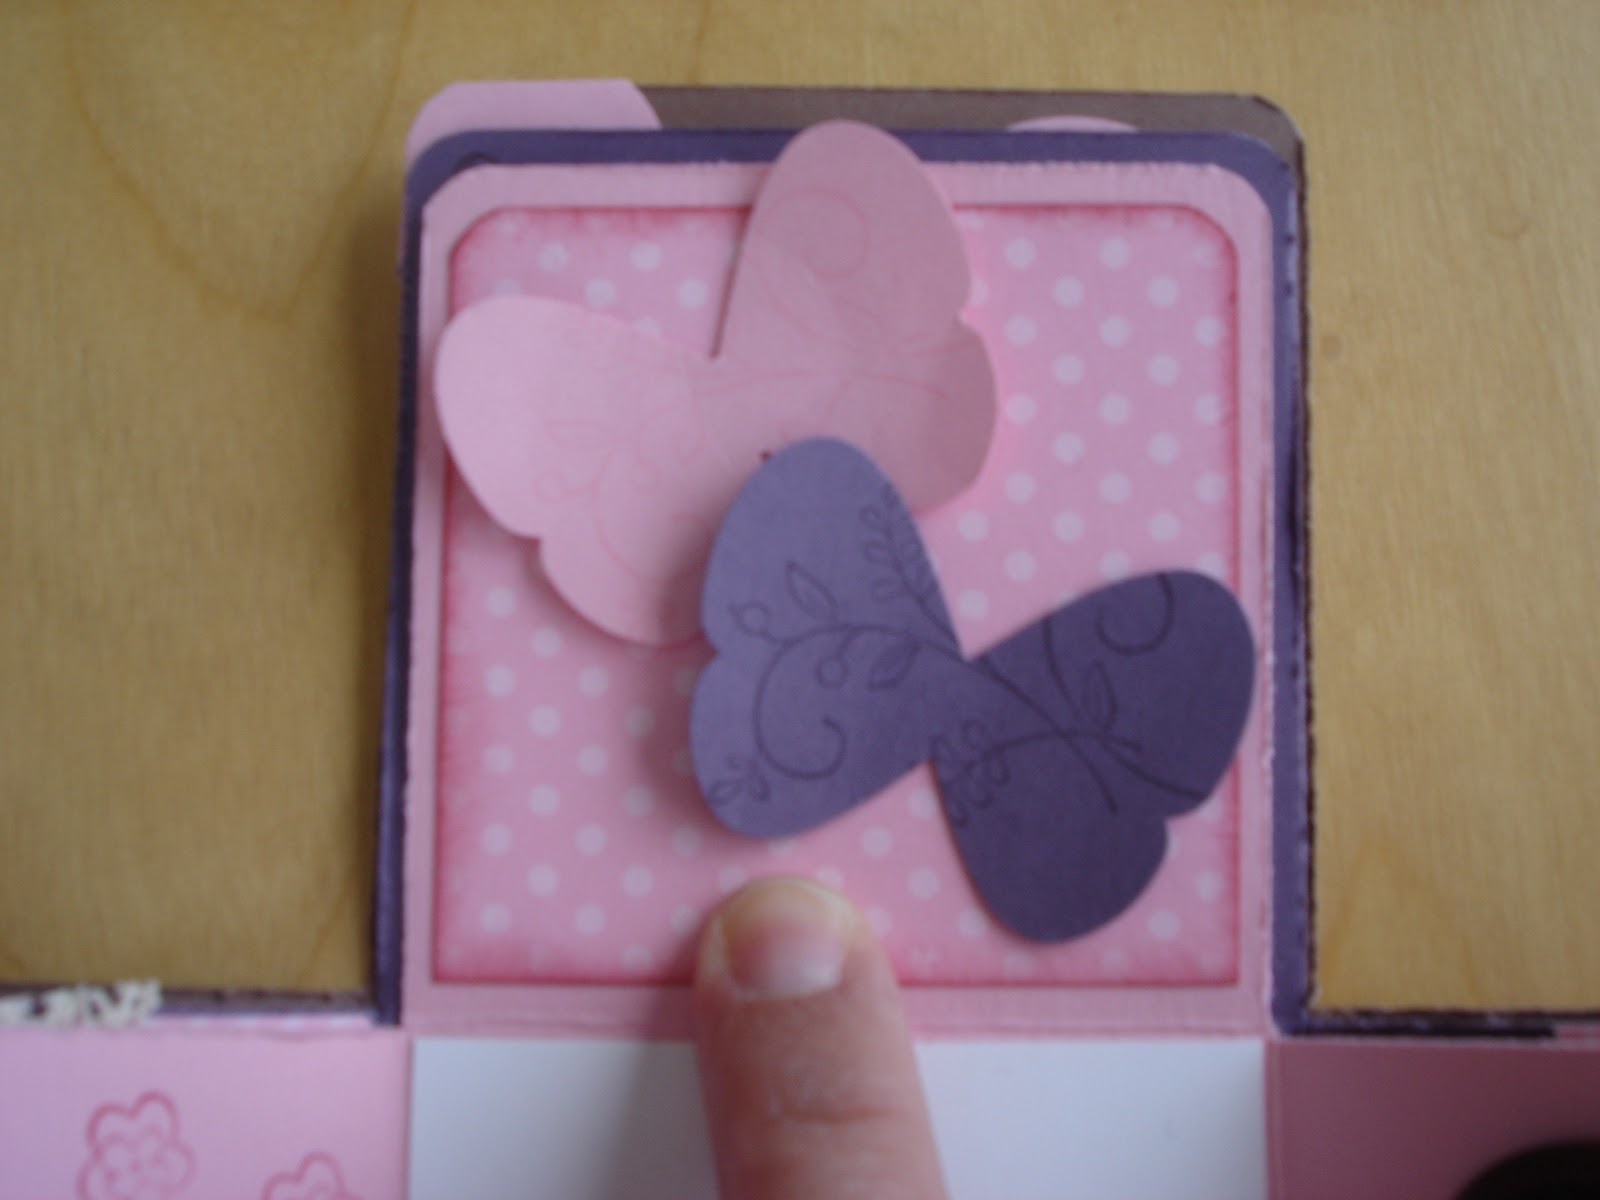
I rounded 2 corners of a piece of Love DSP and sponged the edges with Rose Red then added it to the Pretty in Pink card stock. I punched out 2 butterflies using the Butterfly Extra-Large punch then stamped both with a stamp from the Sweet Summer Sale-a-bration stamp set.

I stamped the elephants from the stamp set Baby Steps in Basic Gray and Regal Rose classic ink and cut them out and adhered them with dimensionals to give them some pop. I stamped the flower from the Bear Hugs stamp set to give the background look.

I used 1/2, 3/4, 1, 1 1/4" circle punches and punched out several circles and adhered them to the Close to Cocoa card stock.

Added buttons from the Springtime Vintage and Sweet Stitches Designer Big Buttons from the Occasions Mini Catalogue. I added Hemp Twine to the smaller buttons. I adhered these using the Glue Dots.

Added 3 Clear Rhinestone Brads, 3/8" Pretty in Pink Taffeta Ribbon and Hemp Twine to the Love DSP and adhered it to the Perfect Plum card stock. I stamped the duck from the Every Little Bit stamp set in So Saffron on Whisper White card stock and punched it out using the 1" Circle punch then sponged edge with Chocolate Chip ink. Adhered with dimensionals.

Punched the Spiral Border punch on the Perfect Plum card stock. Stamped the monkey, giraffe, and lion from the Fox & Friends stamp set in Chocolate Chip, Regal Rose, and So Saffron classic ink. Punched them out using the 1 1/4" circle punch and adhered them with dimensionals. I added a Build-a-brad to the giraffe before adhering it.

I saw a cute baby carriage on someone blog and partially cased it. I used the 2 3/8" Scallop Circle punch, I cut out 3 scallops to create an opening. I punched out the trim using the scallop border punch in Close to Cocoa card stock and trimmed accordingly. I added a bow using Hemp Twine. Wheels are made from Close to Cocoa punched out with the 3/4" circle punch and added Clear Rhinestone Brads and adhered them with dimensionals. The handle is made from the left over scallop.

Sorry for the blurry picture on this one -I added a strip of Love DSP and punched a border on both ends using the Eyelet Border punch. I stamped the baby sleeper from the stamp set A Slice of Life Level 1 Hostess set from the Occasions Mini Catalogue on the Love DSP and cut it out. I coloured some features on the sleeper in Rose Red. I popped it up with a dimensional.

I saw a baby wrapped in a blanket on some one's blog and created something similar. I punched out a 2" x 1 3/8" oval in Pretty in Pink and cut some off the bottom. I punched out 2 small leaves from the Blossom Petals Punch in Pretty in Pink. I sponged both leaves and oval in Regal Rose and a bit of Rose Red. I added some White Gel pen to both the leaves and oval. I punch out a 3/4" circle in Blush Blossom (retired) added a bit of sponging in Crumb Cake. I added some Rose Red for cheeks and some dots in the White Gel pen and the black marker for eyes. I adhered this on the oval. I added a button from the Sale-a-bration button & ribbon pack.

Supplies Used:
Stamp Sets: Punch Bunch S-A-B 121847W & 123211C; Silhouette Sentiments (Level 1 Hostess Set) 118474W & 120127C; Bear Hugs 116966W; Sweet Summer S-A-B 121849W & 123214C; Baby Steps 117092W; Every Little Bit 117096W & 120558C; Fox & Friends 117020W & 118565C; A Slice of Life (Level 1 Hostess Set) 121895W & 121952C
Card Stock: Close to Cocoa (retired); Perfect Plum; Pretty in Pink; Whisper White; Love DSP; Blush Blossom (retired)
Ink: Classic Stampin' Pad -Chocolate Chip 100908; Rose Red 101778; Regal Rose 105211; Pretty in Pink 101301; So Saffron 105213; Basic Gray 109120; Basic Black Stampin' Write Journaler 105394; Uni-ball Signo Gel Pen 105021
Other Supplies: Victoria Crochet Trim 118481; 3/8" Taffeta Pretty in Pink Ribbon 109067; Hemp Twine 100982; Sponges 101610; Anywhere Glue Stick 104045; Glue Dots 103683; Dimensionals 104430; Crimper 101618; Mat Pack 105826; Paper-Piercing Tool 116631; Scallop Edge Border 119882; Eyelet Border 119853; Spiral Border 119872; 2 3/8" Scallop Circle Extra-Large 118874;3/16" Corner Small 119871; Jewelry Tag Medium 117190; Butterfly Extra-Large 119848; Photo Corner Extra-Large 119878; Extra-Large Tag 119866; Large Tag 119876; 2 x 1 3/8" Oval Extra-Large 119859; 1 1/4" Circle Large 119861; 1" Circle Medium 119861; 3/4" Circle Medium 119873; 1/2" Circle Small 119869; Blossom Petals Punch 121808; Springtime Vintage Big Designer Buttons 122301; Sweet Stitches Designer Big Buttons 122302; Ice Cream Parlor Buttons 123529 S-A-B; Clear Rhinestone Brads 113144; Build-a-brad 109128; 5/8" Jumbo Brad 112533; Silver Brad 104336

Don't forget -if you want to get in on the great SALE-A-BRATION, the last day is March 31. Click on the catalogue to the right and check it out. Go to my Stampin' Up! website (or click the SHOP NOW link on the right) to order. You need to place an order of $60 to receive one of these fabulous items for free!!! What a great deal so don't miss out!!!

Thank you for stopping by!! Have a great day!

Susie

Wednesday, March 23, 2011

WOW...time flies...

I truly apologize that I haven't posted in a while. You should see my house. We are in the middle of renovations and hoping to get it done by this weekend. I have been stampin' away though. This Saturday is my first trade show. If you live in Aylmer Ontario area, I hope you will come out to see me. The trade show is for the organization Princess Project in Ontario. Click this link to check it out. http://princessprojectelgin.com/ Come and see what I have for sale. Don't forget to invite your friends. Admission is free to get into this event.

What: Princess Project Trade Show
Where: Bayham Community Complex in Straffordville
Time: 10am - 3pm
Cost: FREE to get in

I will have a post for you on Monday!

See you then!!
Susie

Tuesday, March 15, 2011

Build A Cupcake Punch Tutorial

When I first saw this punch I wanted it so bad but didn't know really how to use it since it cuts out several images at once. So I had to watch a few video tutorials that other demonstrators did on this punch. Once seeing the videos and everyone doing it the same way I decided to get the punch. I started using the punch the same way but didn't like how much card stock I was wasting. So I found a way to waste as little card stock as possible. Here is the tutorial for you!!

This is what the punch looks like.


I cut my strips at 1 1/2" and I stamp my images as you see in the picture above. I do this for the cupcake tops as well.


I cut between each cupcake base.


The Very Vanilla card stock is my handle made from scrap card stock. I put a bit of repositioning adhesive on the end.


Place my cupcake base on the adhesive part of the handle. This is where I place my handle each time I punch my cupcake base.


You can see in this picture that I position my handle so that it doesn't get punched out.


Here is the end result for the cupcake base.


This is the scraps that you end up with!!
Here is how I punch out the cupcake tops.


I stamp the image the same, on a 1 1/2" strip of card stock and cut it out. The difference is where I place my handle when punching. Placing it in the top left side, prevents me from punching out my handle. You can place your handle on the right, it's just that I'm left handed. :)

I hope you like my first tutorial!! Please leave me a comment how what you think.

Have a great day!!

Susie

Monday, March 14, 2011

Celebrate with Sale-A-Bration

We are down to just under 3 weeks until Sale-A-Bration is over. It ends on March 31st. What is Sale-A-Bration? If you spend $60 before shipping & taxes, you receive a free item from the Sale-A-Bration catalogue. There are a lot of great items for you to get!! Not only the ones that are new but also in the back of the catalogue is a long list of stamps that you can get from the current Idea Book & Catalogue. This is a great deal that you don't want to miss out on!!

On with today's card, this card is full of Sale-A-Bration items. All new items that will retire at the end of March.


Supplies Used:
Stamp Sets: Sweet Summer (SAB) 121849W & 123214C; Something to Celebrate (Hostess Level 2; Occasions Mini Catalogue) 121897W & 121955C
Card Stock: Early Espresso -5 1/2 x 8 1/2 scored at 4 1/4; Daffodil Delight -5 1/4 x 4; Ice Cream Parlor DSP (SAB) -2 x 4; Very Vanilla
Ink: Classic Stampin' Pad -Melon Mambo 115656; Daffodil Delight 119667
Other Supplies: Scallop Edge Border Punch 119882; Scallop Oval Punch 119856; 1 3/4" x 7/8" Oval Punch 119855; Glue Dots 103683; Dimensionals 104430; Sanding Block 103301; Bone Folder 102300; Cutter Kit 106958; Ice Cream Parlor Ribbon & Button Pack 123529

Technique Tip: Using the Sanding Block, sand your card stock or DSP to give it the distressed looked. To add more distressing, take the cutter kit and scrape the card stock or DSP.
For the border punch, I punched the border out first then distressed it. After, I curled the scallops using my bone folder.

Hope you had a great weekend Everyone!! I may not have many post this week due to March break. Hoping to do lots of fun stuff with the kiddos!!

Susie

Friday, March 11, 2011

Gift Idea!!

The Occasions Mini Catalogue has a lovely Big Shot die, the Petal Cone can be used different ways. It can be used as a card, a box and you can hang it as an ornament.


This pictures does not do justice to this cute cone. What I like about it is you can fill it with treats to give a way as a gift.

Supplies Used:
Stamp Set: Easter Blossoms 121905W & 122057C
Card Stock: Rose Red -5 1/2 x 6 1/4 times 2; Crumb Cake for scalloped flaps; Very Vanilla for oval punch
Ink: Rose Red ; Crumb Cake
Other Supplies: Big Shot 113439; Bigz L Die Petal Cone 121810; Rose Red Seam Binding Ribbon 121884; Crumb Cake Seam Binding Ribbon 122332; Springtime Vintage Big Buttons 122301; 2 x 1 3/8" Oval Punch 119859; Sponge 101610

Tool Tip: In order to not waste lots of paper when using your big shot dies, cut the paper about 1/4" larger then the item you want to cut out on the die you are using. Why cut the whole die out when you don't need it all.

All the Springtime options that are in the mini catalogue have me excited for Spring.
Have a great day Stampin' Readers!!

Susie

Thursday, March 10, 2011

Sense of Time...

There are a few things with today's card that I just love!!! One -Riding Hood Red...Two -Sense of Time Stamp Set...Three -Crumb Cake Seam Binding Ribbon...
I never thought I would like the Sense of Time stamp set but I bought it for a special project. I won't share now what that is so you'll have to return to find out!!

Here is my project.


Not sure if you can see it, the top left and bottom right corners have been stamped with the gears of this stamp set. I love the way it adds to the card. The sentiment has been sponged along the edge using Riding Hood Red ink then with Basic Gray. After I took my Riding Hood Red sponge and sponged the whole circle! I hope you like it.

Supplies Used:
Stamp Set: Sense of Time 113804W
Card Stock: Crumb Cake -5 1/2 x 8 1/2 scored at 4 1/4; Riding Hood Red - 5 1/4 x 4; Basic Gray -3 1/2 x 3 1/2; Whisper White -3 1/4 x 3 1/4 & circle
Ink: Classic Stampin' Pad -Riding Hood Red 111836; Basic Gray 109120
Other Supplies: Cutter Kit 106958; 1 3/4" Circle Punch 119850; Crumb Cake Seam Binding Ribbon 122322; Sponges 101610; Dimensionals 104430

To order any of the supplies used to make this card, CLICK HERE or email me at scrapwithsusie@hotmail.com

I hope your day is great!!
Happy Stampin'!!

Susie

Wednesday, March 9, 2011

Mother's Day Card

I know Mother's Day isn't for a couple of months. But I wanted to play around with the Build a Blossom stamp set and the Blossoms Petal Punch.


Supplies Used:
Stamp Sets: Build a Blossom (Occasions Mini Catalogue) 121923W & 121994C; All Holidays 114916W
Card Stock: Pink Pirouette -5 1/2 x 8 1/2 scored at 4 1/4 & Petals; Always Artichoke -51/4 x 4; Crumb Cake -4 1/4 x 2 1/2; Certainly Celery -leaves
Ink: Classic Stampin' Pad -Pink Pirouette 111838, Regal Rose 105211, Certainly Celery 105217, Always Artichoke 105219, Basic Black 101179
Other Supplies: Blossom Petals Punch 121808; 1/2" Circle Punch 119869; 1" Circle Punch 119868; 1 1/4" Grosgrain Certainly Celery Ribbon 119771; Springtime Vintage Button Crumb Cake 122301; Cutter Kit 106958; Glue Stick 104045; Crystal Effects 101055; Sticky Strips 104294; Dimensionals 104430

I hope you enjoy this card! Have a great day!

Susie

Tuesday, March 8, 2011

Hostess Set...

The stamp set I used today is a hostess set. Would you like to earn this lovely set?! Contact me to book your workshop to find out how to earn it. Invite some friends and we'll stamp together. What a great night that will be!!


"So happy for you" is from one of our wonderful Sale-A-Bration stamp sets. You can receive this set for free when ordering $60 in products before shipping & taxes.

Supplies Used:
Stamp Sets: Punch Potpourri (Hostess Level 1 Set) 118394W & 120124C; So Happy for You 121853W & 123220C
Card Stock: Pretty in Pink -size 5 1/2 x 8 1/2 scored at 4 1/4 & 2 3/4 x 3; Rich Razzleberry -size 5 1/4 x 4 & 15/16 x 3; Certainly Celery -size 5 1/4 x 2 1/2; Basic Gray -size3 x 3 1/4; Very Vanilla -size 2 1/2 x 2 3/4; 11/16 x 2 3/4
Ink: Classic Stampin' Pad -Basic Gray 109120; Rich Razzleberry 115658; Stampin' Write Markers -Certainly Celery 105106; Pretty in Pink 100045
Other Supplies: Eyelet Border Punch 119853; Neutrals Brads Basic Gray 119736; 5/8" Grosgrain Rich Razzleberry Ribbon 119957; Mat Pack 105826; Paper-Piercing Tool 116631; Corner Small Punch 119871; Dimensionals 104430

Have a terrific day!!

Susie

Monday, March 7, 2011

More Mustard....

I have this thing about the colour More Mustard. I'm not a big fan of it. So I thought I would challenge myself. My challenge to use it, even if it was a little bit. So here it is...


Supplies Used:
Stamp Sets: Tiny Tags 118091W & 118592C; Sweet Summer (Sale-A-Bration) 121849W & 123214C
Card Stock: More Mustard -size 5 1/2 x 8 1/2 scored at 4 1/4; Wild Wasabi -size 5 1/4 x 4 & 2 3/4 x 3 1/4; Certainly Celery -size 5 1/4 x 1 1/4; So Saffron -size 3 x 3 1/2; Very Vanilla 2 1/2 x 3
Ink: Classic Stampin' Pad -Wild Wasabi 109014; So Saffron 105213; More Mustard 103162
Other Supplies: 5/8" Very Vanilla Jumbo Brad 112533; Neutrals Brad Very Vanilla 119736; Jewellry Tag Punch 117190; Cutter Kit 106958; 1 1/4" Certainly Celery Grosgrain Ribbon 119771; Mat Pack 105826; Paper-Piercing Tool 116631; Dimensionals 104430

I challenge you to use a colour that isn't your favourite. I am going to challenge myself to use the other few colours that aren't mine.

Have a great day!!!

Susie

Sunday, March 6, 2011

Colour Challenge #7

Wow, it's been a full week since I posted last. Sorry about that. This past week has been full of exciting news and also lots of work.
I am taking part of a trade show on March 26th in Straffordville, Ontario. This show is for the Princess Project. The Princess Project is an organization for young women who can not afford to buy a dress for events such as prom or graduation.
I am also taking part of a yard sale on April 2nd in Leamington, Ontario. This sale is to help raise money for the Leamington MOPS program.
If you are in one of the two areas please come out to support both organizations. I will be selling cards and 3D items at both events. As well as take orders for Stampin' Up! products as well as for special cards that you would like to give away to that special someone.
Another exciting news, my cousin from the Leamington area has signed up to be a demonstrator. You can find her blog at http://scrappingemz.blogspot.com/. I would like to congratulate Justi and wish her all the best. Please check her blog for all the creations she makes.

As the title says, I have a my colour challenge #7 for you. The colours are Poppy Parade, Pear Pizzazz, and So Saffron. The first 2 colours are a part of this years (July 2010-June 2011) In Colours. Every year, Stampin' Up! comes out with 5 new colours to spice up the year with exciting colours. Starting in July 2011, you will see 5 new In Colours, but what is exciting is that this years In Colours stay for 1 more year. So, each year we get to play with the In Colours for 2 years. Isn't that exciting?!


So here is my card. I made this card for a friend of mine. Her birthday was this past week. This stamp set is my favourite Sale-A-Bration set. Unfortunately Sale-A-Bration is almost done -March 31 is the last day to get any of the Sale-A-Bration items. How do you get them, spend $60 before shipping and taxes and get 1 free item from the Sale-A-Bration catalogue. And there are a lot of items to choose from including a long list on the last page of items from the current Idea Book & Catalogue.


Supplies Used:
Stamp Sets: Bliss (Sale-A-Bration) 121851W & 123217C; Curly Cute 117014W & 120510C
Card Stock: So Saffron -size 4 1/4 x 11 scored at 5 1/2; Pear Pizzazz -size 4 x 5 1/4; Sunny Garden DSP -size 3 3/4 x 5; Whisper White -size 2 1/2 x 4 & 3/4 x 3 3/8
Ink: Classic Stampin' Pad -So Saffron 105213, Pear Pizzazz 119784
Other Supplies: Spingtime Vintage Button 122301; Antique Brad 117273; Linen Thread 104199; Glue Dots 103683; 3/16" Corner Small Punch 119871

Technique: I stamped the main image in So Saffron then I smashed it on Pear Pizzazz to give it a soft and exciting look. I hope the picture is clear enough for you to see.
Try it: Take an image, ink it up in a little colour then smash it on a darker colour. Then stamp that image on your card stock. Remember to never do this technique in reverse, meaning don`t ink it up in the darker colour then smash in the littler colour. It won`t work.

I hope your weekend is going well!!!

Susie