Showing posts with label Christmas. Show all posts

Monday, November 19, 2012

Christmas Blog Hop


Once again we are doing our Simply Stars blog hop. The theme for this one is Christmas!! My favourite time of the year.

For my project today, I made the cute 6 Panel Mini Milk Carton. I can't wait to find the right size candle and give these to my daughter's teachers for Christmas.

Here it is!


Here is the supply list:
  • Gumball Green Card Stock 126840
  • Very Vanilla Card Stock 101650
  • Be of Good Cheer DSP 126896
  • Wonderful Winterland Stamp Set 123819
  • Stazon Jet Black Ink Pad 101406
  • Early Espresso Ink 126974
  • Stampin' Write Markers 119806 &126856
  • Stamping Sponges 101610
  • 1/8" Very Vanilla Taffeta Ribbon 119960
  • Cherry Cobbler Baker's Twine 123125
  • Extra-Large Tag Punch 119866
  • Big Shot Machine 113439
  • Mini Milk Carton Bigz L Die 117310
  • Crop-a-dile (retired)
Thanks for stopping by!! Hope you enjoy the rest of the hop!

Susie

Head over to Heather's blog!


1. Heather Summers
2. Christine Dionne
3. Martha Inchley
4. Laura Richey
5. Sundee Himburg
6. Marja Deeth
7. Anne Granger
8. Kristy Strawbridge
9.Steph Cremin
10. Susie Hamm

Tuesday, December 27, 2011

Joy to the World Garland

Here is the other gift I made for my daughters' teacher.


Sorry for the background. But hope you like it has much as I do.

Susie

Monday, December 26, 2011

Merry Christmas Lollies Wreath

My oldest daughters have an amazing teacher!! They are in JK and SK so therefore have the same teacher but they are on opposite days. I wanted to make something really special for her because she is such a blessing to our girls!!

Here is the first gift I made for her!


This wreath is made with our Frostwood Lodge Designer Series Paper, Card Stock, Simply Scored Tool, Embellishments and Ribbon all from Stampin' Up! Store bought items are: hot glue, hot glue gun and wooden wreath.

Hope you enjoy this project as much as I enjoyed making it!!

Susie

Sunday, December 25, 2011

Merry Christmas!!!

I'd like to wish you all a very Merry Christmas & a Happy New Year!!


Susie

Friday, November 25, 2011

On to Christmas we go!!

I have been crazy busy in the last month. We moved into my mom's house while waiting for our house to be built. I've also been busy with my Christmas events.

Right now we have an Online Extravaganza over at www.stampinup.com. Click on Hot Deals to see what we have on sale. There are a lot of great deals. In just over a month our Holiday Mini Catalogue is done and the Occasions Mini Catalogue is coming out along with the Sale-a-bration. If there is anything you still want from the Holiday Mini, let me know.

Last Saturday I had a group of ladies attend my Christmas Advent Box event. Here are pics of the box.


Days 1-6 with a punched out snowflake lined with Pool Party marker and Dazzling Details added to make it sparkly.


Days 7-12 with a stamped stocking and punched out with the stocking punch.


Days 13-18 with a wreath made from a 1 3/4 circle and the small flowers from the Itty Bitty Shapes Punch Pack. I added some basic jewels and a hemp twine bow.


Days 19-24 with a Contempo ornament stamped 5 times (4 of them are glued in pairs). I added basic jewels on this one as well.


Here you can see I created the drawers out of Stampin' Up! Matchbox die. The top opens as well to add a little gift for someone as well.


I'm sure you noticed that the top box rotates. This allows you to see the front of it with each side that you have facing out. On the top box, I used the Timeless Type Junior Alphabet dies for the Big Shot. I also used the basic rhinestones, the jingle bells and another snowflake.

Happy Weekend and Stampin'!

Susie

Thursday, January 13, 2011

Scrapbook Page


I've been working hard on some fun projects that I can't wait to share with you!!!! So stay tuned to see what is coming. I've also been busy getting my business up and running. I had my first workshop on Monday and what a great night that was!!! Thank you to all my ladies who came out! I will be sharing the projects that we made with you all soon. I'm going to be very busy with what is coming up. I have a few classes I want to start in the next month. Stay tuned for that as well!

So on to today's project...
A Christmas scrapbook page?!?! Yes, in my house I have 3 little girls who are still talking about Christmas like it will be here in a few days again...so I made this page for them. And they love it!! I still need to add a picture and some journaling to finish it up! But I wanted to share it with you.

Supplies Used:
Stamp Sets: Snow Swirled 111690 -wood mount; Contempo Christmas 120594 -clear mount
Card stock: Certainly Celery -size 12x12; Cherry Cobbler -size 8 1/2 x 11; Old Olive textured -size 5 1/4 x 7 1/4 & 4 x 2 1/4 & scraps; Very Vanilla -size 1 3/4 x 2 1/4 & 4 x 5; Jolly Holiday Designer Series Paper -size 6 x 8; scrap paper for ornaments
Inks: Classic Stampin' Pad -Old Olive 102277; Cherry Cobbler 119669
Other Supplies: Ornament Extra-Large Punch 119847; Eyelet Border Punch 119853; Clear Rhinestone Brads 113144; Hemp Twine 100982; 5/8" Old Olive Grosgrain Ribbon 109054; Sponge Dauber 102892; 2-Way Glue Pen 100425; Paper-Piercing Tool 116631; Mat Pack 105826

CLICK HERE FOR ONLINE ORDERING 24/7

Wednesday, December 29, 2010

Christmas Cards


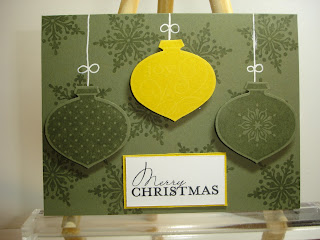
Here are a few Christmas cards that I made this year for family & friends. These cards are all made using Stampin' Up! products. If there is a card that you are interested in knowing more about send me a comment on this post. If there are any products that you are interested in purchasing just go to my Stampin' Up! website.


 This pink & brown card is done by stamping the images with versamark and sprinkling clear embossing powder to them, then heating the image with the heat tool. After, adding Chocolate Chip & Regal Rose classic ink with a sponge to the cardstock.

 This is the front of the card. The 2 pictures below is the inside of the card.